Posts

Showing posts from October, 2020

How to insert a slide from the one presentation to other presentation in MS PowerPoint.

Image
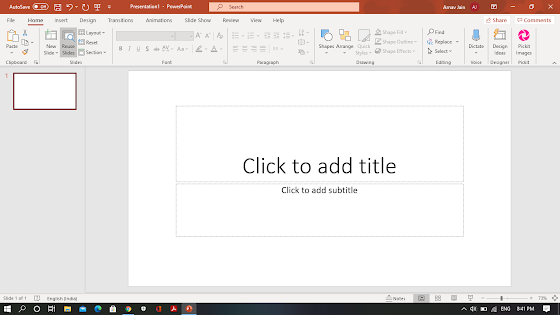
Welcome to The Technophile. Today , we will see how we can insert a slide from the other presentation to another presentation in MS PowerPoint .   Step 1 - Open MS PowerPoint in your PC. Click on Reuse Slides. Step 2 -  Click on Choose Content of the presentation of whom who want to insert a slide. Step 3 - Click on Insert Slide  of the slide which you want to insert .  Step 4 - Choose the more slides you want to insert. Step 5  -  The slide will be inserted in the presentation.   Hope this worked for you. Please give me your valuable feedback in the comment section.

How to share screen in Google Meet.

Image
  Welcome to The Technophile. Today , we will see how we can schedule a meeting  in Google Meet. Step 1 - Open Google Meet and join or start a meeting.   Step 2 - Click on Present Now.   Step 3 - Click on A Chrome tab . You can also  choose  a window or your entire screen.   Step 4 - Select which application you want to share and then click on Share. Step 5 - To stop your screen sharing , click on Stop presenting. Hope this worked for you. Please give me your valuable feedback in the comment section.

How to schedule a meeting in Google Meet.

Image
  Welcome to The Technophile. Today , we will see how we can schedule a meeting  in Google Meet. Step 1 - Open Google Meet in your PC. Click on New meeting. Step 2 - Click on Schedule in Google Calendar in the menu. Step 3 - You will be directed to Google Calendar. Add a title for your meeting. Step 4 - You can also change the other settings like the duration etc. Step 5 - Your meeting will be scheduled. Click on it whenever you want to start the meeting Step 6 - After clicking on it, click on Join with Google Meet. Step 7 - Click on Join Now. Step 8 - Your meeting will be started. Step 9 - To share the link , click on My meeting and then on Copy Joining Info . You can  then forward the link . Hope this worked for you. Please give me your valuable feedback in the comment section.

How to Schedule your Calendar in Google Calendar.

Image
  Welcome to The Technophile. Today , we will see how we can  share and work on a Jam file in Google Meet. Step 1 -  Click on Google Apps and then on Calendar.  You will be directed to Google Calendar. Step 2 - Hold the left mouse button and drag  towards the bottom according to your requirement. Step 3 - Add a title for your event. Step 4 - Click on Save. To set a reminder -  Step 1- Hold the left mouse button and drag toward the bottom. Step 2 - Click on Reminder. Step 3 - Add a title for your reminder and click on Save. Step 4 - Your reminder will be saved. You can come to Google Calendar to check your schedule. Hope this worked for you. Please give me your valuable feedback in the comment section.

How to share and work on a Jam file in Google Meet.

Image
  Welcome to The Technophile. Today , we will see how we can  share and work on a Jam file in Google Meet. Step 1 - Open  Google Meet in your PC. Start or Join  a new meeting. Step 2 - Click on More options. Step 3 - Click on Whiteboard in the menu. Step 4 - Click on Start a new whiteboard. You can also choose from Google Drive.   Step 5 - A jam file will be shared in the chat . Click on the link. Step 6 - You will be directed to this page. You whiteboard is now ready.  Step 7 - You can draw, add text, erase it and much more. This is a Jam file . You can use it like a whiteboard and you can also store it .You can choose a Jam file  from your Google Drive. Hope this worked for you. Please give me your valuable feedback in the comment section.

How to share your screen in a Zoom meeting.

Image
Welcome to The Technophile. Today , we will see how we can share our screen in Zoom meeting. Step 1 - Open a Zoom meeting. Click on Share Screen or press Alt + S.   Step 2 - Select Screen and click on Share. Step 3 - Screen sharing will be started. You will also see a green boundary line. Go to  the application you want to share. Step 4 - To stop your screen sharing, click on Stop Share or press Alt + S. Step 5 - Your screen share will be stopped. Hope this worked for you. Please give me your valuable feedback in the comment section.

How to Schedule a Zoom meeting.

Image
  Welcome to The Technophile. Today , we will see how we can schedule a Zoom meeting. Step 1- Open Zoom in your PC. Click on 'Schedule'.      Step 2 -   You can select a topic for your meeting and schedule it according to you .   Step 3 - You can select the date and time for the meeting. Select the duration of the meeting according to you. Step 4 - You can also change the video , security and other settings. Click on 'Save' , you can join or start the meeting whenever you require. Hope this worked for you. Please give me your valuable feedback in the comment section.

How to set up Skype on your PC.

Image
Welcome to The Technophile. Today , we will see how we can setup Skype on our PC .   Step 1 - Download Skype from Microsoft  Store and login through your Microsoft account. If you don't have a Microsoft account, refer this link for my previous blog related to setting up a  Microsoft account .  Link-   https://rb.gy/edrysx Step 2 -  You will be logged in your Skype. You can now make groups to chat, video call etc. Step 3 - You can Add files , send a voice recording to your friends in Skype . You can also invitemore people in the group.   Hope this worked for you. Please give me your valuable feedback in the comment section.  

How to use WhatsApp on your PC.

Image
Welcome to The Technophile. Today , we will see how we can  open WhatsApp in our PC. Step 1 - Visit web.whatsapp.com . Step 2- Open WhatsApp application on your phone. Click Settings. Next c lick  WhatsApp Web . Click on the Add button. Step 3 - Scan the QR code using your phone. Step 4 - WhatsApp will be opened in your PC. You can also open WhatsApp in Your PC by downloading the WhatsApp application in Windows or Mac.  Step 1 - Visit https://www.whatsapp.com/download/ to download it. Download WhatsApp. Step 2 -  Open WhatsApp. Scan the QR code. Hope you found this informative. Please give your valuable feedback in the comment section.