Posts

Tutorial 4 : Hello World

Image
 Welcome to The Technophile. Today ,we will start programming in QBasic and start with most common message "Hello World"  .  Step 1- Open the QBasic window in your PC.  Step 2  - Type the PRINT command in QBasic and Hello World.        ----->      PRINT "Hello World" Step 3 - Now we need to run the program  so that the computer can interpret and execute the data. To do that, you can click on Run and then on Start or just simply pressing F5 on your keyboard. As you can see, the output is displayed on the output screen saying "Hello World". Thankyou.  Hope you liked the blog.

Tutorial 3 : Functions of QBasic

Image
 Welcome to The Technophile. Today , we are going to learn about functions in QBasic like REM , CLS , INPUT , PRINT and  LET. . REM  Command - This function is used to write remarks that are also known as comments in a program. These statements are not important and the computer does not execute this command.                CLS Command - This function is used to clear the output screen.     INPUT Command - This function is used to take input from user and store that input in the variable.        PRINT Command - This function is used to print any type of text in the output screen.        LET Command - This function is used to give value to a variable. This command is optional.        END is used to end a program. Thankyou,  Hope you liked the blog.

Tutorial 2 : Formatting in QBasic

Image
 Welcome to The Technophile. Today , We will learn how to format a QBasic Window . To Design the Window , follow these steps. Step 1: Click on Options located in the Menu Bar. The tool can help you change the design , font , color of the window and the text.   Step 2 - Click on Display and you can edit  the width and height of the window.        You can also increase   or decrease  the number of pixels in the window.    Step 3 - You can change the IDE Colors and change the colors of strings ,comment etc by just following these steps Thankyou . Hope you liked the blog.

Tutorial 1 : Introduction to QBasic

Image
 Welcome to The Technophile. Today, I am going to start a course of QBasic and will tell you about the functions. This is how a QBasic window looks like. QBasic is a high-level language. It consists of various menu options and bars and the default name of a new QBasic File or Qb.exe is Untitled. The extension of a QBasic file   is .bas It is easy to start coding with QBasic as it is easy to understand  and a perfect language for beginners. We will code in QBasic and learn different features of this extraordinary language. Thankyou.  Hope you liked the blog .

How to show two windows together on your screen in Windows 10 .

Image
  Welcome to The Technophile. Today , we will see how we can show  two windows together on your screen in Windows 10 . Step 1 -  Open the  window you need in the left. Step 2 - Click on Windows Key + Left Arrow Key . Step 3 - Minimize the window by click on the Minimize button. Step 4 - Open another window you  want in the right . Step 5 - Click Windows Key + Right Arrow Key. Click 6 - Click on the Google Chrome window located in the taskbar.                                                         Step 7 - When you will click it , it will appear on the left side.                                                                          ...

How to insert a slide from the one presentation to other presentation in MS PowerPoint.

Image
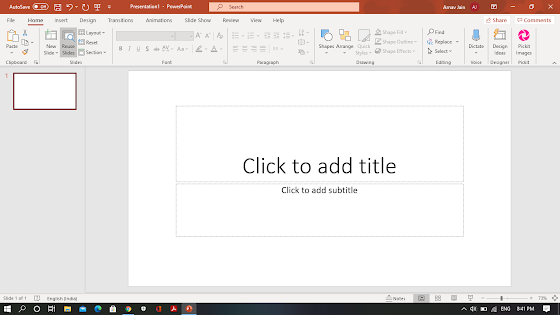
Welcome to The Technophile. Today , we will see how we can insert a slide from the other presentation to another presentation in MS PowerPoint .   Step 1 - Open MS PowerPoint in your PC. Click on Reuse Slides. Step 2 -  Click on Choose Content of the presentation of whom who want to insert a slide. Step 3 - Click on Insert Slide  of the slide which you want to insert .  Step 4 - Choose the more slides you want to insert. Step 5  -  The slide will be inserted in the presentation.   Hope this worked for you. Please give me your valuable feedback in the comment section.

How to share screen in Google Meet.

Image
  Welcome to The Technophile. Today , we will see how we can schedule a meeting  in Google Meet. Step 1 - Open Google Meet and join or start a meeting.   Step 2 - Click on Present Now.   Step 3 - Click on A Chrome tab . You can also  choose  a window or your entire screen.   Step 4 - Select which application you want to share and then click on Share. Step 5 - To stop your screen sharing , click on Stop presenting. Hope this worked for you. Please give me your valuable feedback in the comment section.

How to schedule a meeting in Google Meet.

Image
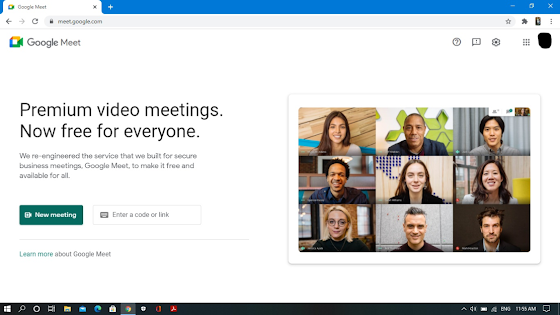
  Welcome to The Technophile. Today , we will see how we can schedule a meeting  in Google Meet. Step 1 - Open Google Meet in your PC. Click on New meeting. Step 2 - Click on Schedule in Google Calendar in the menu. Step 3 - You will be directed to Google Calendar. Add a title for your meeting. Step 4 - You can also change the other settings like the duration etc. Step 5 - Your meeting will be scheduled. Click on it whenever you want to start the meeting Step 6 - After clicking on it, click on Join with Google Meet. Step 7 - Click on Join Now. Step 8 - Your meeting will be started. Step 9 - To share the link , click on My meeting and then on Copy Joining Info . You can  then forward the link . Hope this worked for you. Please give me your valuable feedback in the comment section.

How to Schedule your Calendar in Google Calendar.

Image
  Welcome to The Technophile. Today , we will see how we can  share and work on a Jam file in Google Meet. Step 1 -  Click on Google Apps and then on Calendar.  You will be directed to Google Calendar. Step 2 - Hold the left mouse button and drag  towards the bottom according to your requirement. Step 3 - Add a title for your event. Step 4 - Click on Save. To set a reminder -  Step 1- Hold the left mouse button and drag toward the bottom. Step 2 - Click on Reminder. Step 3 - Add a title for your reminder and click on Save. Step 4 - Your reminder will be saved. You can come to Google Calendar to check your schedule. Hope this worked for you. Please give me your valuable feedback in the comment section.

How to share and work on a Jam file in Google Meet.

Image
  Welcome to The Technophile. Today , we will see how we can  share and work on a Jam file in Google Meet. Step 1 - Open  Google Meet in your PC. Start or Join  a new meeting. Step 2 - Click on More options. Step 3 - Click on Whiteboard in the menu. Step 4 - Click on Start a new whiteboard. You can also choose from Google Drive.   Step 5 - A jam file will be shared in the chat . Click on the link. Step 6 - You will be directed to this page. You whiteboard is now ready.  Step 7 - You can draw, add text, erase it and much more. This is a Jam file . You can use it like a whiteboard and you can also store it .You can choose a Jam file  from your Google Drive. Hope this worked for you. Please give me your valuable feedback in the comment section.